Sishah
Popular Posts
-
PowerEdge T130 Onboard RAID Controller STOR0502 Message Unable to launch RAID Configuration wizard. Detailed Description No RAID c...
Tuesday, June 13, 2023
Thursday, December 30, 2021
Email Forwarding using ExchangeOnline module with PowerShell
1. Open PowerShell as Administrator
2. Enter below command on PowerShell (Change the user name and domain name)
Import-Module ExchangeOnlineManagement
Connect-ExchangeOnline -UserPrincipalName UserName@OldDomainName.com
# Get mailbox forwarding details
Get-Mailbox UserName@DomainName.com | Format-List ForwardingSMTPAddress,DeliverToMailboxandForward
# Enable Email Forwarding
Set-Mailbox -Identity "UserName@OldDomainName.com" -DeliverToMailboxAndForward $false -ForwardingSMTPAddress "UserName@NewDomainName.com"
# Remove Forwarding rules from Mailbox
Set-Mailbox UserName@DomainName.com -ForwardingSmtpAddress $Null
Monday, October 28, 2019
How to Troubleshoot Meeting Invitations in Outlook
1) Meeting creation: attendee not found
One of the steps for setting up a meeting on the Outlook calendar requires you to specify the meeting attendees.
During this process, some users experience problems with finding a particular attendee on the global address list or loading them up for the meeting.
To solve this problem, it’s usually sufficient to refresh the locally cached Address Book.
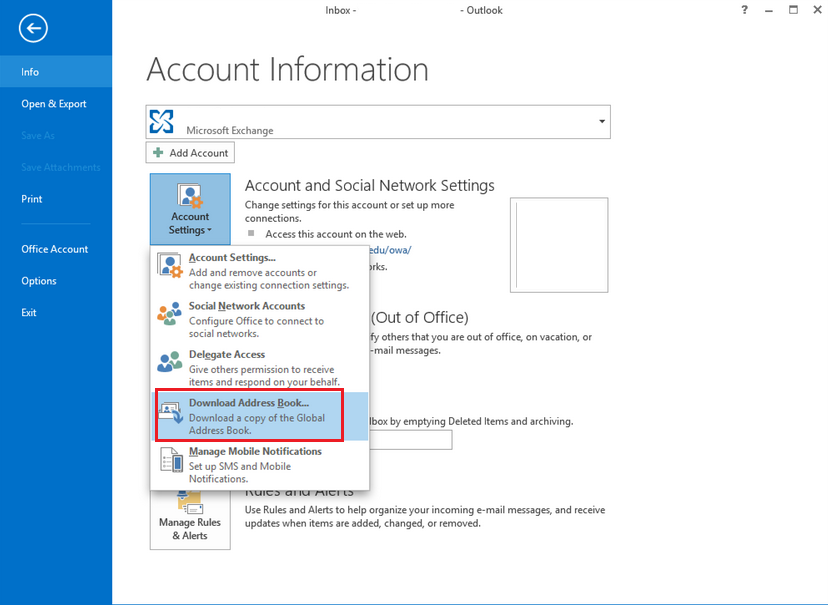
In Outlook, click on File, select Account Settings, and then choose Download Address Book.
2) Free/Busy doesn’t work: no info appears
The Outlook calendar comes with an excellent feature called Scheduling Assistant, also known as Free/Busy. It basically lets you know if the person you’d like to send an invitation to is already busy or unavailable for your selected date/time range.
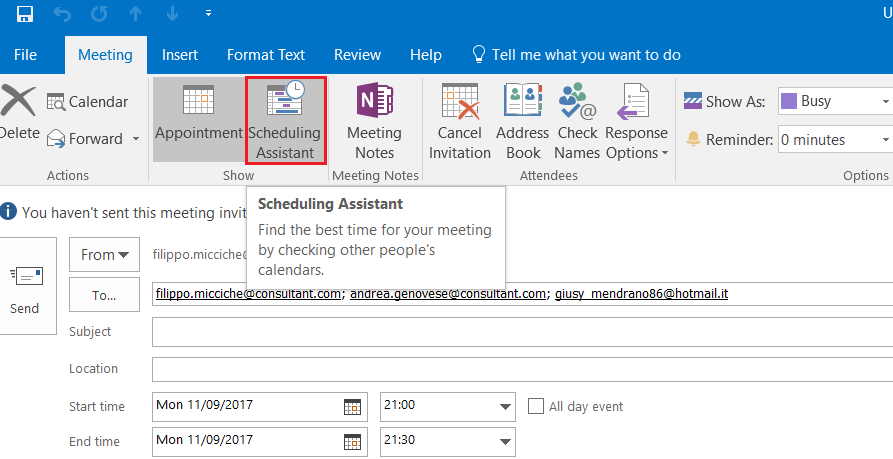
To open this feature, simply navigate to the Meeting tab, and click on Scheduling Assistant:
Vertical bars mark the start and end times of meetings. The color legend at the bottom is a good reference for the formatting on screen.
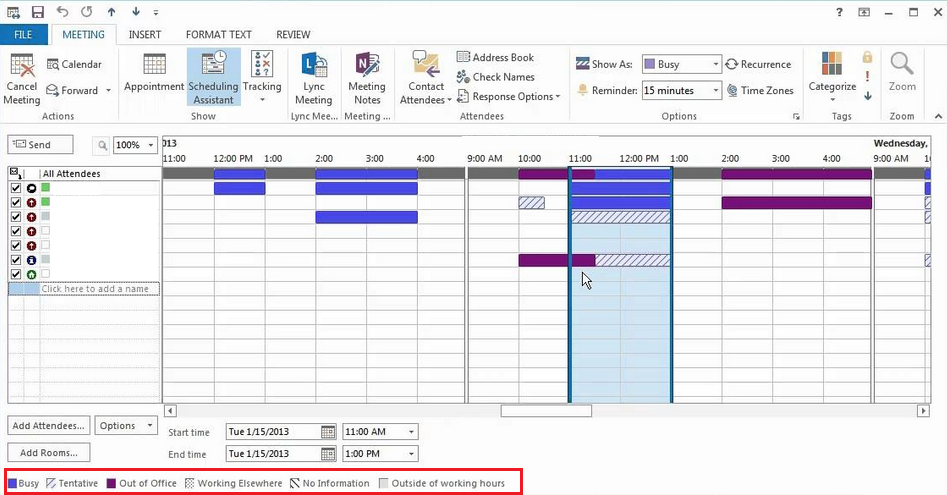
Sometimes, the Scheduling Assistant may refuse to provide you with information about an attendee’s availability.
When this happens, cells will be filled with diagonally striped lines like the ones below:

This issue can usually be fixed by following these steps:
1) Run “Outlook.exe /Cleanfreebusy”
The command switch Outlook.exe /Cleanfreebusy restores Free/Busy data. This switch can only be used when Outlook is online.
2) Refresh the Outlook Address Book (OAB)
In Outlook, click on File, select Account Settings, and then choose Download Address Book.

3) Check if the Autodiscover Service is working:
To retrieve Free/Busy information from Exchange Server, Outlook needs to be able to access Availability service endpoints, which are defined by the Autodiscover service.
It’s important to ensure that the Autodiscover service is answering requests from clients who can’t get Free/Busy data.
To do so, you can use Microsoft’s Remote Connectivity Analyzer Tool, a collection of web-based tools designed to identify connectivity issues affecting the Exchange Server environment. It’s easy and quite intuitive, but before running any tests, make sure you select the correct options.
To download the tool, visit https://testconnectivity.microsoft.com/
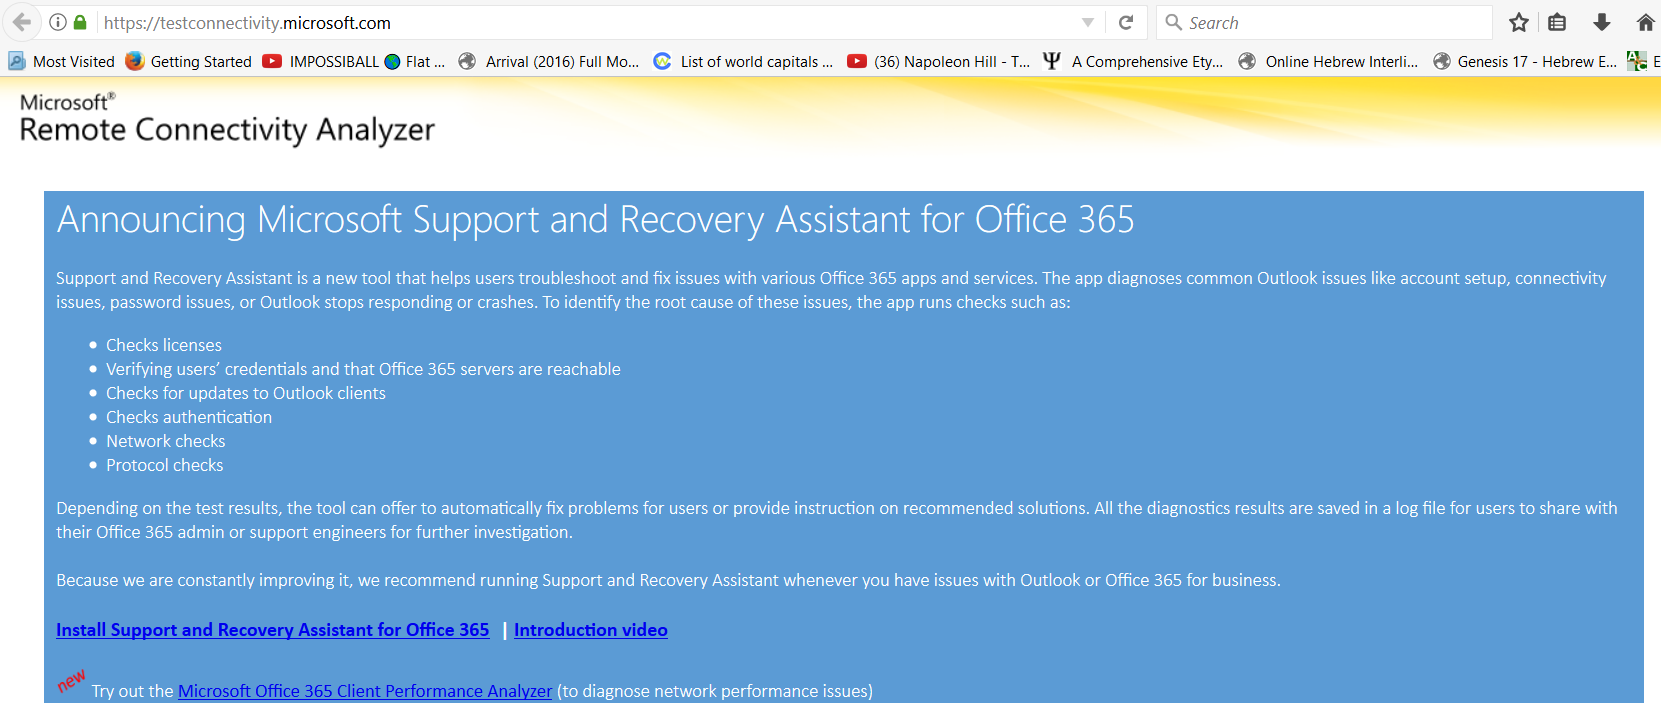
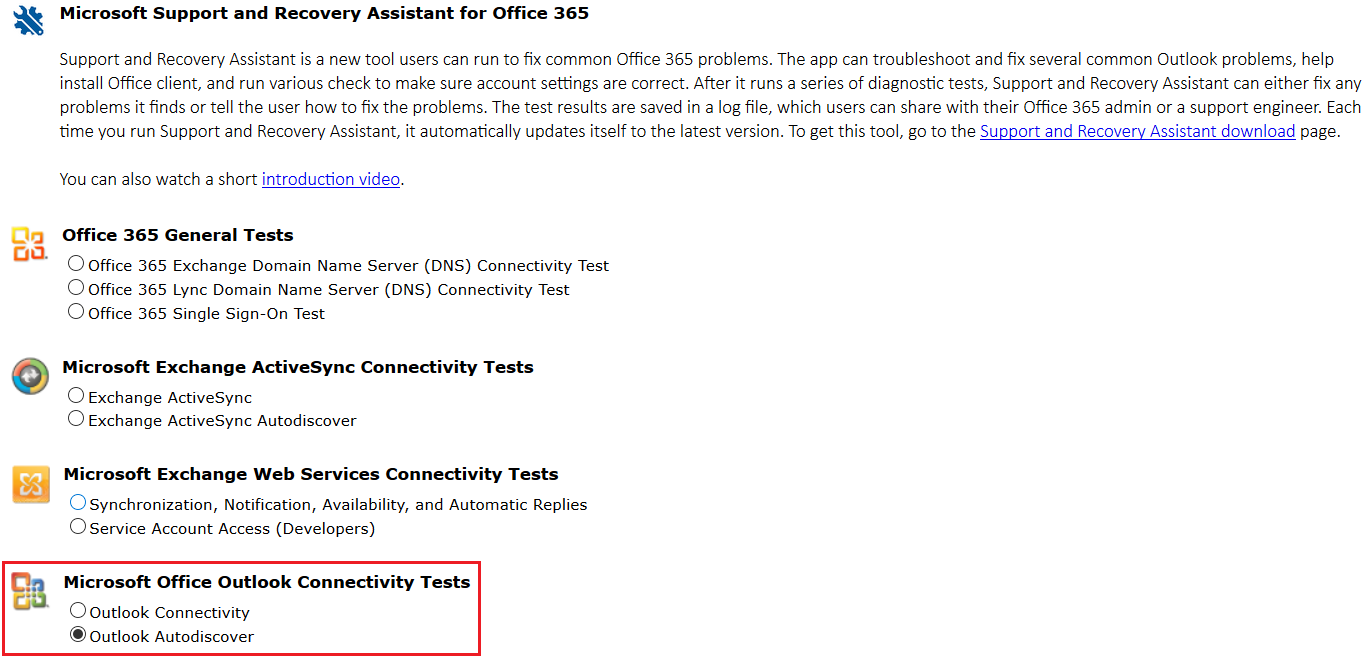
Then, select the Office 365 tab.

Under Microsoft Office Outlook Connectivity Tests, choose Outlook Autodiscover, and click Next.
On the Outlook Autodiscover page, fill out the form, and click Perform Test when you’re finished.
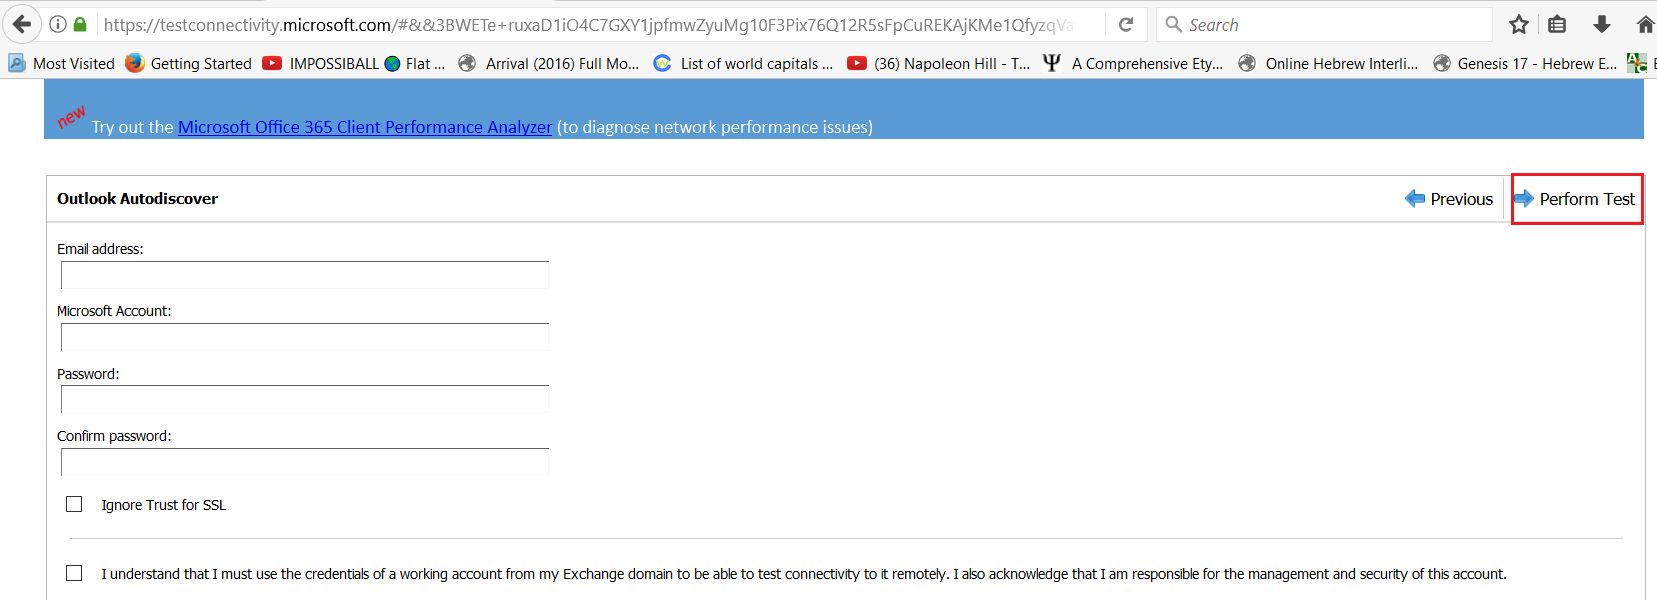
Save the log results, and send them to your System Administrator for further analysis.
3) Outlook meetings disappearing
If you’re unable to see the meeting invitation you just sent on your Outlook calendar, follow these steps to resolve the problem:
1) Run “Outlook.exe /cleanroamedprefs”
This switch command cleans (and copies again) your Outlook roaming preferences from the local settings of the PC on which it is run.
Roaming settings are a small collection of settings that govern reminders, the Free/Busy grid, working hours, calendar publishing, and RSS rules.
Settings running on Exchange Server can change during an Outlook session. Normally, as soon as new settings become available, they are updated for the user client. Unfortunately, in certain cases, this doesn’t happen, leading to various problems. Running Outlook.exe /cleanroamedprefs should fix the problem.
To do so, click on Start. In the search box, type Outlook.exe /cleanroamedprefs, and hit enter. (Note: there is a space after “.exe” and before the forward slash).
Outlook should start up again.
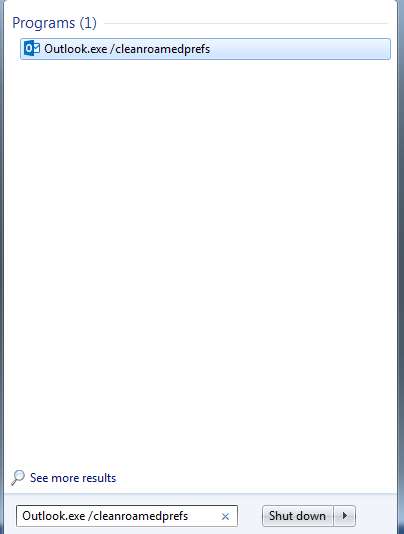
2) Run “Outlook.exe /sniff”
The switch command Outlook.exe /sniff overrides the programmatic lockout that defines which client is processing the meeting item.
It will open Outlook, look for new meeting requests in the inbox, and add them to the calendar.
Click on Start. In the search box, type Outlook.exe /sniff, and hit enter.
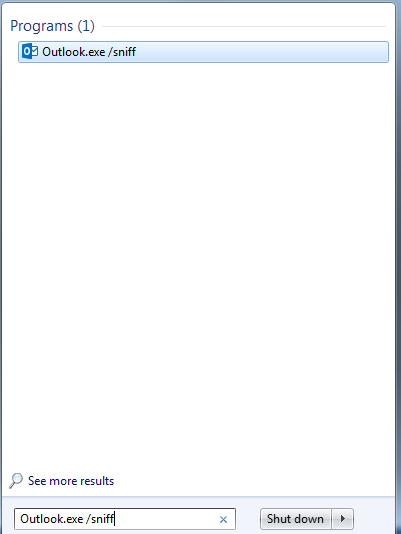
3) Run “Outlook.exe /cleanprofile”
This command removes invalid profile keys and rebuilds default registry keys, as needed.
Click on Start. In the search box, type Outlook.exe / cleanprofile, and hit enter.
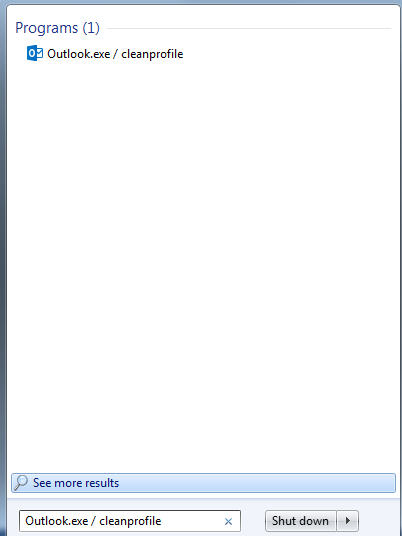
Should the issue persist, proceed as follows:
4) Check if the meeting is visible on the cloud calendar of the Outlook Web App
The Outlook Web App (OWA) is the Microsoft Exchange web-based email client. The user interface is similar to that of Microsoft Outlook, but the web-based version doesn’t require the client software (Outlook) to run on your PC.
Just go to https://login.microsoftonline.com, provide the required credentials, and log in.
Then, navigate to the Calendar.
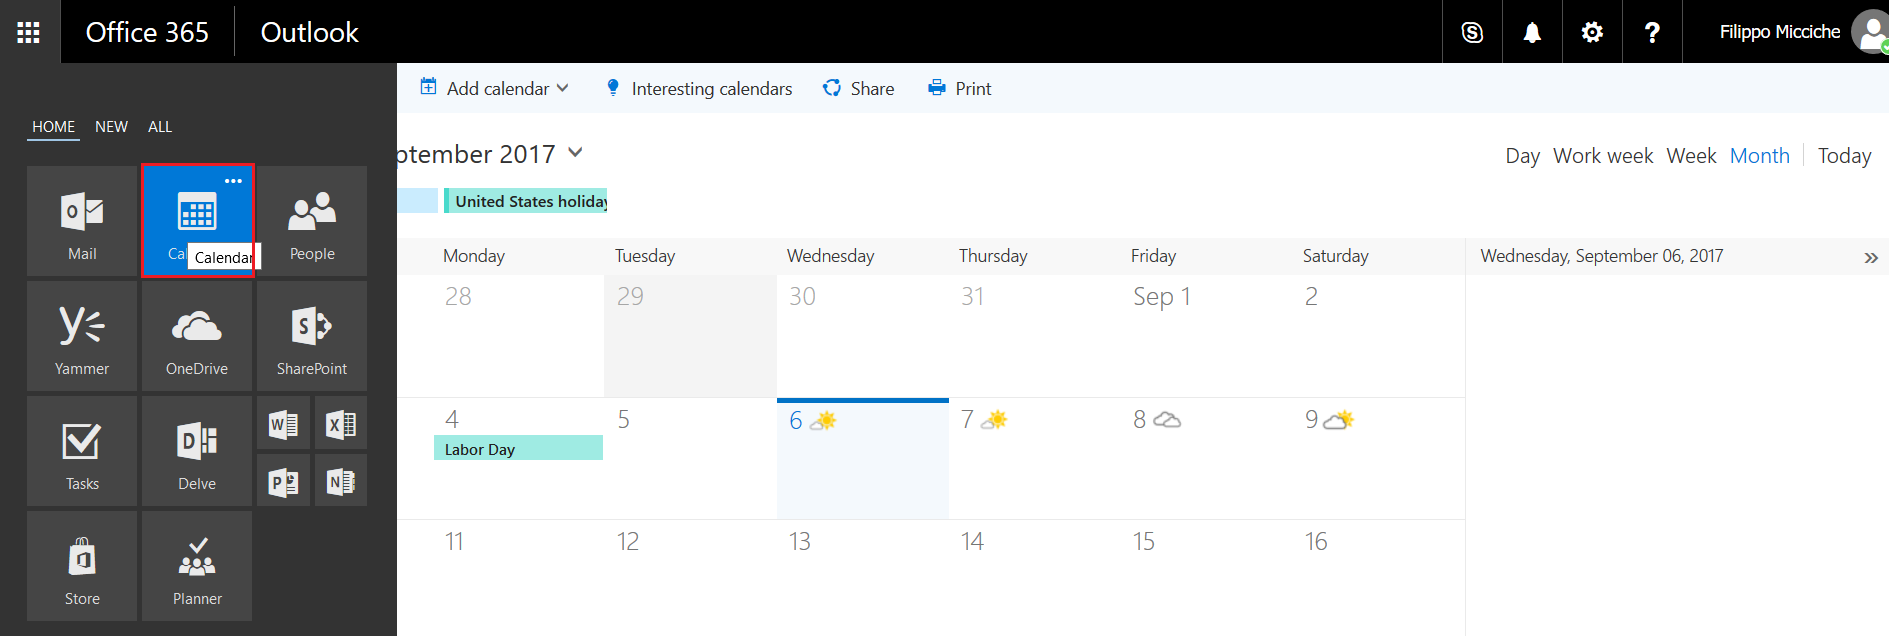
The meeting is not present on the OWA calendar
If the meeting is not present on the OWA calendar, the best thing you can do is contact your system administrator so they can check their Exchange Server data.
The meeting is present on the OWA calendar
In this case, the problem is likely with your Outlook software.
Follow these steps: Repair your Outlook profile.
- Repair your Outlook profile.
- In Outlook, go to File.
- Click the dropdown arrow next to Account Settings, and select Account Settings.
- On the Email tab, select your account (profile), and click Repair.
- Follow the prompts in the wizard. Afterwards, restart Outlook.
- Create a new Outlook profile, and check if the meeting invitation is visible on the new profile calendar.
- Close Outlook.
- Go to Start, and navigate to the Control Panel. Click on Mail.
- The Mail Setup window will pop up.
- Click on Show Profiles.
- Click on the Add button.
- Choose the name for the new profile, and click OK.
- The Autodiscover service should be able to create the Outlook profile automatically.
- Click Next and then Finish.
- Revisit the Mail Configuration window, and select the option that reads ”Always use this profile”.
4) Duplicate meetings are being sent
Several users have noted the issue where Outlook Calendar will repeatedly send the same meeting invitation to attendees, even if they’ve already confirmed their times.
This is most often (but not always) caused by external device protocols that communicate with Exchange Server. In fact, if the meeting organizer or one or more attendees are synchronizing their calendars on their smartphones, the synchronization is typically handled by a network protocol developed by Microsoft called Exchange ActiveSync.
In such cases, the calendar tends to misbehave.
What is Exchange ActiveSync?
Exchange ActiveSync is a network protocol responsible for synchronizing mobile devices with your Exchange mailbox. It allows mobile users to access their email, calendar, contacts, and tasks.
What happens?
Simply put, many mobile OS versions (Windows included) don’t play nice with Microsoft ActiveSync, generating a wide range of calendar issues.
Let’s take a look at how we can address these.
1) Run “Outlook.exe /Cleanreminders”
This switch command clears and regenerates calendar reminders.
Click on Start. In the search box, type Outlook.exe /Cleanreminders, and hit enter.
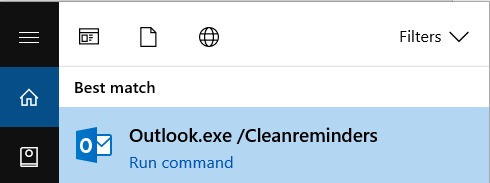
Restart Outlook, and check if the issue persists.
2) Delete the meetings in question
The meeting organizer and all attendees must delete the meeting.
It will be necessary to remove the meeting from:
- The Outlook client software
- The Mail application synchronizing your mailbox to the external device
- The Outlook Web App calendar
Then, the meeting will need to be recreated.
Right-click on the meeting invitation, and select Cancel Meeting.
Right-click on the meeting invitation, and select Cancel Meeting.
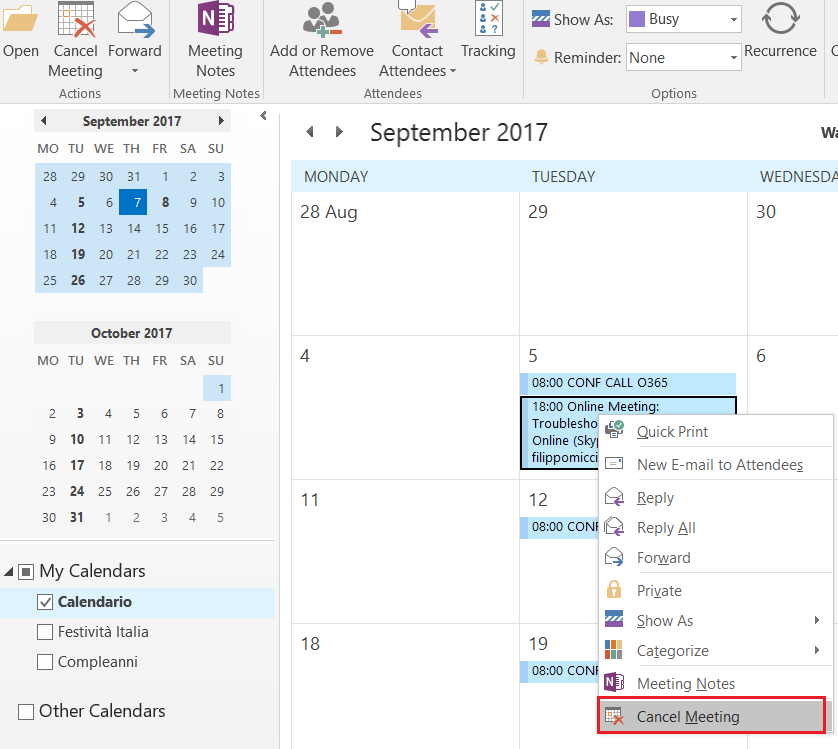
3) Log out from the Mail application on the external device
If the issue persists, the meeting organizer or attendees will need to temporarily log out from the email applications installed on their devices.
This will help narrow down the possible root causes to determine whether the problem is caused by Exchange ActiveSync.
Most likely, the issue will disappear once you log out of the mobile email application.
After deleting and recreating the meeting, try synchronizing the mobile email application calendar one more time to see if things work properly
Reference : https://www.sherweb.com/blog/office-365/troubleshoot-meeting-invitations-outlook/
Reference : https://www.sherweb.com/blog/office-365/troubleshoot-meeting-invitations-outlook/
Tuesday, July 30, 2019
How to remove OneDrive from File Explorer
How to remove OneDrive from File Explorer
- Use the Windows key + R keyboard shortcut to open the Run command
- Type regedit, and click OK to open the registry.
- Browse the following path:
4.HKEY_CLASSES_ROOT\CLSID\{018D5C66-4533-4307-9B53-224DE2ED1FE6}
-
5. double-click the System.IsPinnedToNameSpaceTree DWORD.
6. Change the DWORD value from 1 to 0.
For Onedrive for business
Computer\HKEY_CLASSES_ROOT\CLSID\{04271989-C4D2-A616-F573-4CD5894883DC}
For Onedrive for business
Computer\HKEY_CLASSES_ROOT\CLSID\{04271989-C4D2-A616-F573-4CD5894883DC}
Sunday, July 7, 2019
How to Trace Email in Exchange
How to Trace Email in Exchange
1.
Loin to exchange management console
3.
Go to mail flow and Message Trace
4.
Fill the details and hit search
Tuesday, March 12, 2019
Add or Remove Sleep in Power Menu
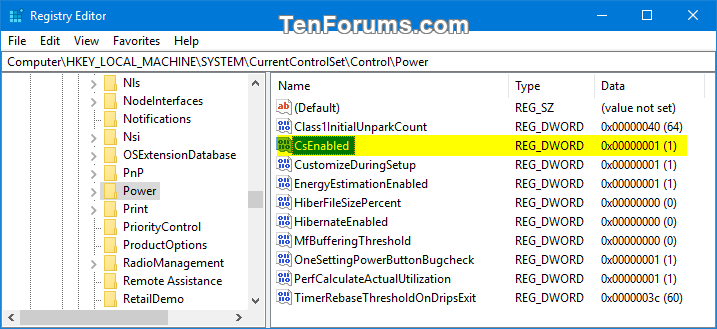
Add or Remove Sleep in Power Menu using a REG file
HKEY_LOCAL_MACHINE\SOFTWARE\Microsoft\Windows\CurrentVersion\Explorer\FlyoutMenuSettings
ShowSleepOption DWORD
0 = Remove
1 = Add
or
Add or Remove Sleep in Power Menu using Local Group Policy Editor
1. Open the Local Group Policy Editor.
2. In the left pane of Local Group Policy Editor, navigate to the location below. (see screenshot below)
 Computer Configuration/Administrative Templates/Windows Components/File Explorer
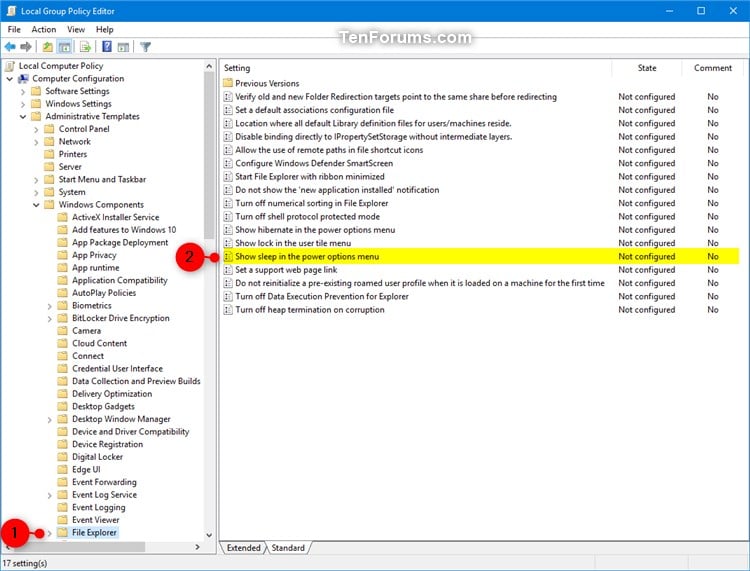
3. In the right pane of File Explorer in Local Group Policy Editor, double click/tap on the Show sleep in the power options menupolicy to edit it. (see screenshot above)
Tuesday, January 29, 2019
How to setup conditional call forwarding on your iPhone running iOS 8.x or earlier version.
How to setup conditional call forwarding on your iPhone running iOS 8.x or earlier version.
The codes are as follows: 1) To setup "Call forward if busy", simply dial *67*{NumberRetrieved}*11# and tap "Call" 2) To setup "Call forward if not answered", simply dial *61*{NumberRetrieved}*11*15# and tap "Call" 3) To setup "Call forward if unreachable", simply dial *62*{NumberRetrieved}*11# and tap "Call" 1) To deactivate "Call forward if busy", Simply dial #67# and tap "Call" 2) To deactivate "Call forward if not answered", Simply dial #61# and tap "Call" 3) To deactivate "Call forward if not reachable", Simply dial #62# and tap "Call"
Subscribe to:
Comments (Atom)

